chocolate chiffon cupcakes + vanilla buttercream frosting
Valentine’s Day is next weekend and while I admit I am not a huge Hallmark-holiday fan, because of my kids I have come to really love this holiday. Candy hearts, cupcakes, designing silly cards, chocolates, and did I mention cupcakes? Cupcakes are a staple in our household, and they should be in yours too. Really, they’re good for you: they release happy vibes and smiles like no other confection.
Here’s my favorite recipe for Chocolate Chiffon Cupcakes with my all-time favorite frosting recipe for Vanilla Buttercream Frosting. Both are so incredibly simple, you’ll wonder why you’ve been buying the boxed mixes all these years (yes, I am talking to you). This recipe makes about 16-18 regular cupcakes or about 25-28 mini cupcakes.
CHOCOLATE CHIFFON CUPCAKES
1-1/2 cups cake flour (although regular flour will do)
1/2 cup unsweetened cocoa
1 teaspoon baking powder
1/4 teaspoon baking soda
1/4 teaspoon salt
4 large eggs – separate the yolks from the whites and place in separate bowls
3/4 cup vegetable oil
3/4 cup sugar plus 2 tablespoons sugar
Preheat oven to 325 degrees.
1. Combine flour, cocoa, baking powder, baking soda and salt in a large bowl.
2. In a different bowl, whisk egg yolks, vegetable oil, and 1/3 cup water until well blended. Whisk in 3/4 cup sugar. Add this mixture to the flour mixture until well blended.
3. In a new large bowl with mixer, beat egg whites until frothy. Gradually add remaining 2 tablespoons sugar and beat until soft peaks form. This usually takes a few minutes. Add this egg-white mixture to the other batter and fold in gently with a spatula until nicely blended.
4. Fill cupcake liners or your DeMarle muffin cups about 3/4 full
5. Bake at 325 for about 20-25 minutes. Use a toothpick to test one of the cupcakes in the middle; poke the middle of a cupcake with a toothpick and if it comes back clean, it’s done. If there is still chocolate batter on the toothpick, it’s not quite ready yet. You can also usually tell by touching the top of a cupcake: if it springs back up slightly, it’s ready; if it stays imprinted down a bit then it needs to bake a little longer.
6. Bake on a cooling rack until completely cooled. Then ice with the awesomeness that is the frosting recipe below.
VANILLA BUTTERCREAM FROSTING
1 16-oz package powdered sugar
1/2 pound (1 cup) butter softened at room temperature
1/8 teaspoon salt
2 tablespoons milk
vanilla extract
1. In a bowl with a mixer on low speed, beat butter, 2 cups powdered sugar and salt until blended.
2. Add milk & vanilla and beat until blended.
3. Add remaining powdered sugar 1 cup at a time until it’s all well blended. Then turn up the speed to medium-high and beat until it’s beautifully smooth & fluffy.
4. Frost the cooled cupcakes and enjoy!
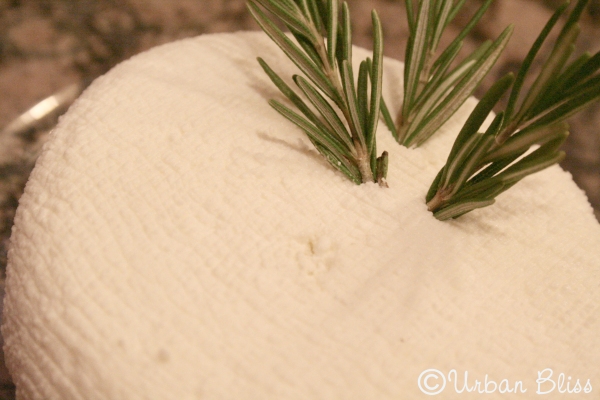
I Made Cheese!!!
Hubby came home a little early tonight around 6.
Me to husband: “I made cheese!”
Husband stops in his tracks with a completely baffled look on his face: “You MADE cheese? Cheese?!”
Me, with a big ol’ S.E.G. and pretty darn proud of myself: “Yes! Cheese!”
Now, my husband hails from Switzerland, where they love their hard cheeses. I didn’t make an Emmentaler cheese nor would I ever want to. But I did make Buttermilk Fresh Cheese, using this recipe from Country Living magazine (yes, I subscribe. shut it.).
I l.o.v.e. cheese. Hard cheese, soft cheese, cream cheese, cheese, cheese, cheese. Love it! This recipe is SO freakin’ easy to make, you just have to try it for yourself. With different toppings, it would be a great dish to bring to a party or to serve as an appetizer for your own dinner party.
SERVING IDEAS:
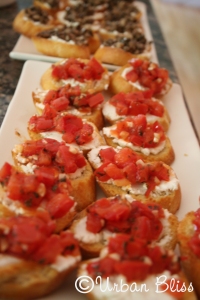
I really love goat cheese on baguette slices with different toppings, and think that in the future, I can easily substitute the Buttermilk Fresh Cheese I made today for goat cheese when making my classic bruschetta with tomato topping and also with mushroom topping. Here are some shots of bruschetta I made last year.
Go make your own cheese today! It’s SO easy!
Cool Weather Chicken
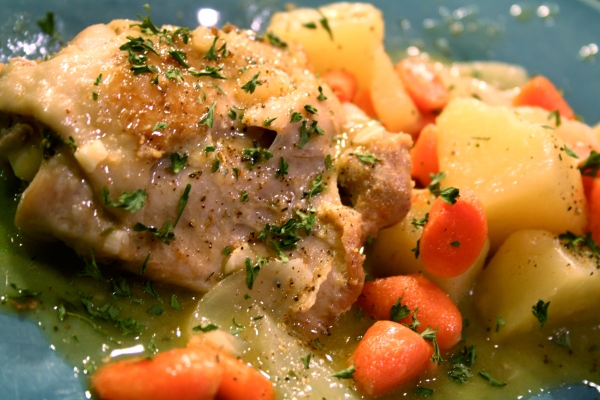
It’s BRRRR cold outside, friends! If you’re looking for a quick, easy cold weather meal to warm your sassy selves this winter, this is it. I threw this together one night when I defrosted chicken thighs, but knew I didn’t want to make my teriyaki lemon chicken… yet again. It turned out surprisingly good…great, in fact! So amazingly wonderful that hubby didn’t hesitate for seconds and we actually had nothing leftover. The chicken was so tender, the veggies done just right, and the flavor of sweetness just melting in your mouth…mmm. Tasty.
The prep & active cooking time is approximately 30 minutes, with 30-40 more minutes for the chicken & veggies to cook uninterrupted.
2 tablespoons extra-virgin olive oil
4 skin-on chicken thighs
1 tablespoon ground paprika
salt & pepper to taste
1 cup quartered onion
2 minced garlic cloves (you can add as few as one or as many as 3 depending on size & your garlic preference)
1 cup carrots sliced diagonally into 1.5″ pieces (just kidding-you can slice them as big as 2″ but don’t slice them too small or they’ll be too mushy. and feel free to not cut them on the diagonal. you rebel you)
2 baking potatoes chopped into roughly 1.5-2″ cubes
2 tablespoons flour
1 14-oz can of chicken stock
1/2 cup dry white wine
1-1/2 tablespoons of fresh thyme (or 1 tablespoon of dried thyme)
1. In a medium skillet, heat olive oil.
2. Salt & pepper the chicken thighs and sprinkle the paprika on each thigh evenly.
3. Add chicken to the skillet and brown on all sides over medium-high heat, about 4-6 minutes.
4. Set browned chicken aside on a plate and place chopped veggies into the skillet.
5. Saute veggies for about 2 minutes, then sprinkle flour over veggies and stir until the flour is thoroughly mixed in.
6. Slowly add the chicken broth and wine to the skillet. Bring to a boil.
7. Once boiling, return the chicken to the skillet, reduce heat to medium-low, cover, and let simmer for 30-40 minutes, until chicken is thoroughly cooked.
8. Once chicken is cooked, remove from heat and sprinkle with parsley.
Substitution ideas
1. I just made this dish tonight with the addition of mushrooms. You can throw in any other veggies you like, just be sure to keep the proportion of veggies to chicken similar to the above recipe, or adjust your cooking times.
2. Add fresh parsley instead of or in addition to thyme at the end.
3. Substitute more chicken stock in place of the wine.
Enjoy! This is a wonderful hearty meal for a chilly winter day.
Sausage & Pepper Stuffed Mushrooms/Breakfast Hash
Full disclosure up front: I love food. But, the FTC folks probably care more about this disclosure: the fine folks at Reser’s Fine Foods sent me some of the products used in this blog post. Wasn’t that nice of them? Go give them some Twitter and Facebook love & tell them @designmama sent you 😉
As you know from my Savory Salmon Dip post, I love dips. They’re so simple and fast to make, and very versatile. I received a box of new fancy dips from Stonemill Kitchens — Artichoke & Parmesan, Artichoke & Jalapeno, and Three Cheese Pepperoncini — along with a couple of bags of New York Style Bagel Crisps in Sea Salt flavor. They came with recipe cards and suggestions on how to use the dips in alternate ways, such as a spread for Mediterranean Panini or Artichoke & Spinach Quiche. I tried all of the dips; they’re chunky, flavorful, but also be warned that they are all quite salty. After trying these I went out & bought the Seafood & Parmesan dip and it too is quite salty. So combined with the Sea Salt Bagel Crisps (which I normally love by themselves), I was oozing with salt for a day or two. Bloated is not a good look on me.I’ve got to be honest: I’m not a huge fan of the Three Cheese Pepperoncini or the Artichoke & Jalapeno dip. However, I did take a liking to the Artichoke & Parmesan dip, and the accompanying recipe card was intriguing so I decided to test it out & make it as an appetizer for our Christmas Feast.
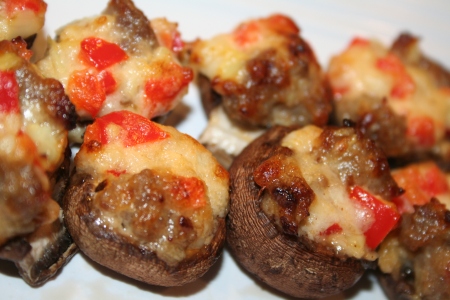
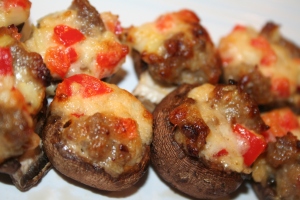
They call it Artichoke & Sausage Stuffed Mushrooms, but I changed the recipe a bit and am more appropriately calling it Sausage & Pepper Stuffed Mushrooms.
You can download their full recipe online, but here were my substitutions:
- I used 2 Italian sausage links, removed from casings. Their recipe calls for 1/2 pound of Italian Sausage, and it should say “ground” sausage.
- I deleted green onions because most Italian Sausages usually have a good amount of herbs in them. I’m glad I did omit them, because I think they would have overpowered the other ingredients.
- I did not use the whole 10 ounce dip; I likely used about 7 oz, and it was just right.
Overall, I was pleasantly surprised with the result. It definitely takes longer than 10 minutes of prep time, so plan for double that (triple that if you have busy kids). This is a great recipe to make a day ahead, cool, place in the fridge, and then the next day you can pop them into a 350 degree oven for 10 minutes before a party and they turn out fantastic. They were quite flavorful, enjoyed at our Christmas Feast, and the recipe actually makes a lot more than enough to fill 24 mushroom caps.
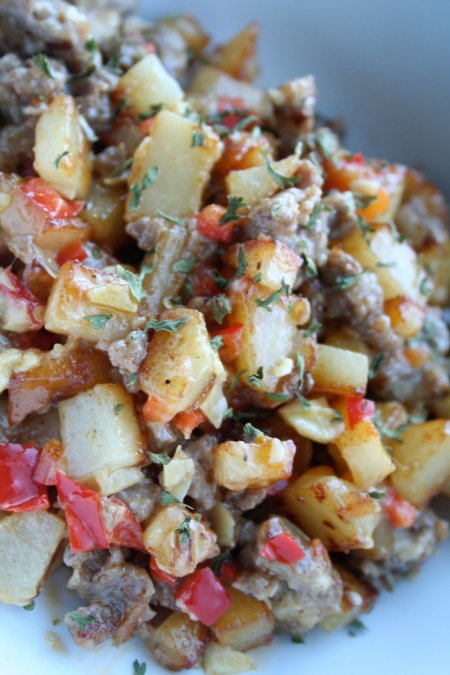
In fact, even after cutting back on quantity of ingredients, I still had a lot of filling leftover and my immediate thought (because I hate to waste good food!): Sausage & Pepper Breakfast Hash.
All you have to do to create the lovely concoction above is to chop up one large baking potato into small cubes, fry them up over a tablespoon of olive oil over medium heat, combine the leftover sausage & dip filling, and voila! I have to say, I truly loved using the dip mixture with this breakfast hash more than the stuffed mushrooms. And now I love that I have a go-to source for expanding my meal options! Check out the Stonemill Kitchens website and download a coupon for $1 off so you can try the dips for yourself!
2009 Christmas Feast
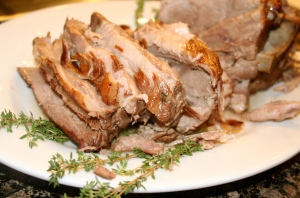
Well, it’s done. Another Christmas Feast behind us. I must say, this year’s was just good but not stellar.We mistimed the roast, so it was a little dry. We used the same recipe we used for the dinner we cooked when both sets of parents were in town, and it was AMAZING for that dinner. For Christmas, it was just ok.
On the menu:
My mom brought her famous lumpia (no Filipino table is complete – ever – without lumpia), my brother & sister-in-law brought their incredible spinach dip, and our friends brought tasty garlic & herb mashed potatoes.
All in all, it was a good meal shared among great friends & family. I hope you all had a lovely Hanukkah/Christmas/Kwanzaa and here’s to a smashing New Year!
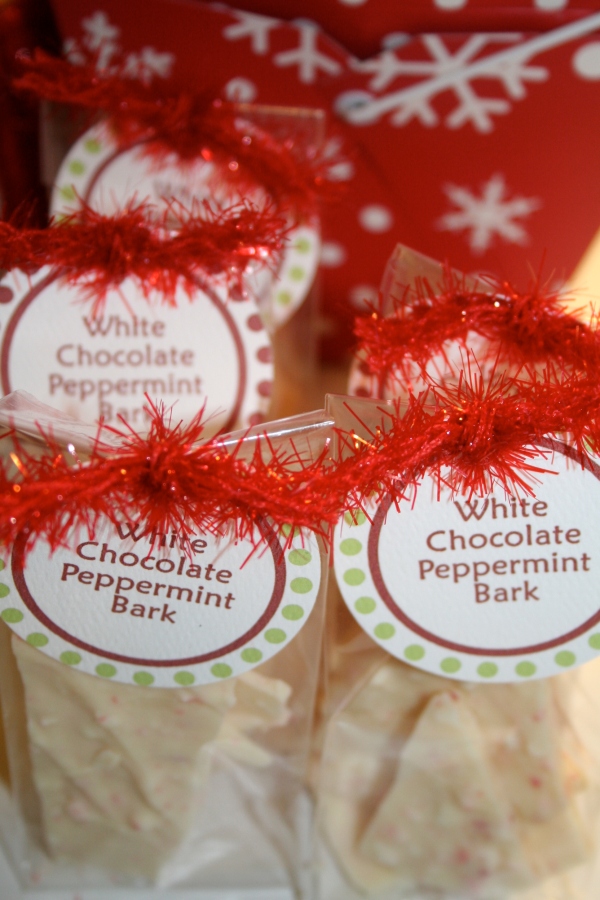
Holiday Food Gift Idea: White Chocolate Peppermint Bark
Food gifts rock. That’s all there is to it. I don’t care if you buy a box of truffles from the store or make them yourself, food is always a thoughtful, useful gift. One SUPER easy treat we like to make as part of our food extravaganza for friends: white chocolate peppermint bark.
2 lbs white chocolate (you can use bars of fine white chocolate like Lindt, but white chocolate chips will work too)
12 traditional red & white candy canes
1/2 teaspoon peppermint extract
1. Melt white chocolate in the top of a double boiler or in a heat-proof bowl over a pot of simmering water.
2. Crush candy canes into tiny little pieces. We like to place them in plastic bags and let the kids hammer away at them with a potato masher or meat tenderizer. Great fun!
3. Stir in chopped candy canes plus the peppermint extract into the melted white chocolate.
4. remove from heat and pour the mixture onto a large baking pan lined with parchment paper (make sure the pan fits into your fridge).
5. Chill until firm then break off into pieces. Keep it refrigerated until you are ready to serve at your holiday party or until you’re ready to give as gifts. I place them in the decorated food bags and keep them in the fridge until it’s time to deliver the goods.
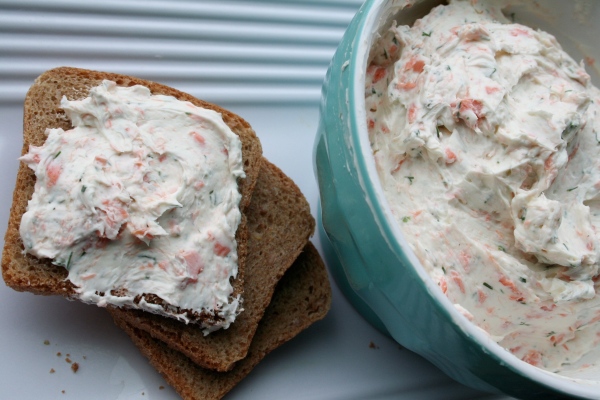
Savory Salmon Dip
Dips are great party dishes. They tend to be inexpensive, you can dress them up as elegant appetizers for fancy parties or keep ’em real for parties that require finger foods, and they’re soooooo addictive.
Here’s a quick and easy appetizer dish that takes about 15 minutes to make, tops. You can take it to Thanksgiving, holiday parties or just make it for yourself & feast on it for a few days. I made the mistake of planning ahead for our Thanksgiving meal contrbutions and made this today. There may or may not be any left over for tomorrow’s Thanksgiving feast…oops. Tomorrow I’ll be making our famous pear & apple crisp (you’ve heard of it, right?) and honey apricot baked brie. Recipes for those dishes are forthcoming.
8 oz whipped cream cheese
1 tablespoon lemon juice
3 tablespoons fresh finely chopped dill
4-6 oz salmon fillet
salt & pepper
1. Heat 1 tablespoon olive oil in a skillet or frying pan over medium heat
2. Sprinkle salmon on both sides with salt & pepper, and also 1 tablespoon of dill
3. Cook salmon over medium heat until cooked (center is no longer rubbery dark pink). Be careful not to overcook the fillet.
4. In the meantime, in a medium bowl, mix the lemon juice, remaining 2 tablespoons of dill, salt and pepper in with the cream cheese until well blended. Taste as you blend, and feel free to add more salt, pepper, lemon juice or dill according to your taste.
5. Once salmon is fully cooked, remove from heat and crumble or chop into tiny bits and fold into the cream cheese mixture until well blended.
1. Serve in a bowl alongside crackers or small rye bread squares
2. Serve by the tablespoonful onto individual rye bread squares or crackers, top with a small spring of dill and a couple of capers for an elegant presentation.
Cheater’s Chocolate Chocolate Cookies
I ran out of flour tonight. FLOUR. Of all things! We make baked goods at least once a week in this house, so it’s so odd to run out of the main ingredient in those baked goods. But, I promised the kiddos we’d make cookies, so I was determined to deliver on my promise. I sifted through our monster binder of cookie recipes. We could make meringues, but those take forever typically, and we Schotlands don’t wait well…especially when there are baked goods involved. I walked into the pantry and sifted through the bins, trying to come up with something else we could use for the base of cookies and still in disbelief that I actually didn’t notice we were out of flour (to be fair, it has been an insanely busier than busy last couple of weeks. But still…).
Then I saw it: a box of cake mix. I’ll let you in on a little secret: I try to always have a box of cake mix on hand at all times. It’s a staple in our pantry, much like, well…flour. If worse comes to worse and the family’s craving (ok, if I am craving) sweets, it’s so easy to whip up a batch of cupcakes. And now I know they make mighty fine cookies too.
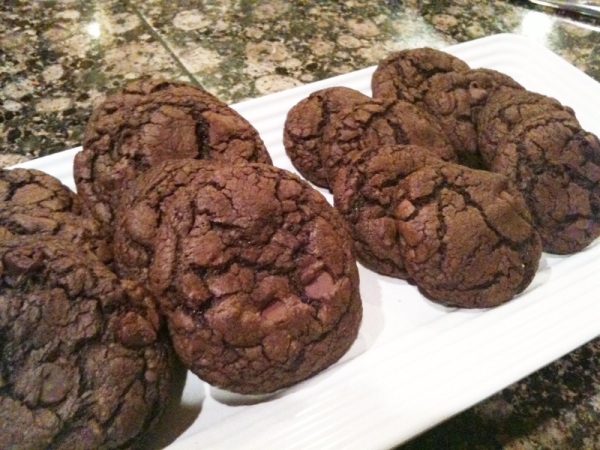
Cheater's Chocolate Chocolate Cookies
Oh. YES. Don’t those look good? Well, they were! We all loved them!
(side note: many of you reading this may already know cupcake batter makes for great cookies. I did not, so please just nod and smile and pretend that this is just the most ingenious creative use of random ingredients you’ve ever heard of, because I was feeling so very tickled pink at this substitution! 🙂

1 Box of chocolate cupcake mix – any kind (Devil’s food, chocolate, dark chocolate, etc) will do
2 eggs
1/4 cup packed brown sugar
1/2 cup melted butter
2 teaspoons vanilla
12 oz chocolate chips

1. Preheat oven to 350 degrees.
2. In a mixer, combine all of the ingredients except the chocolate chips on medium speed until well blended. Don’t over-mix.
3. Add chocolate chips and fold them gently into the batter.
4. Drop tablespoonfuls of batter for adult-size cookies and teaspoonfuls of batter for kid-size cookies onto a baking sheet with a Silpat or onto a greased baking sheet. You can see the adult-size cookies on the left and the kid-size cookies on the right in the above photo.
5. Bake for 11-12 minutes for chewy cookies, 13-14 for crunchy cookies.
Now how easy is that? And yes, I cheated. It not only felt great, but it also tasted oohhhhh sooooo goooooood! 🙂
No Measurements Mushroom Marsala
I love recipes. I hate recipes. I’ve always been a “don’t you dare tell me it has to be this ONE way or it won’t work” kinda gal. The thing is, almost every recipe in existence can easily be transformed: large entrees can be rationed into appetizers for parties, pasta dishes can be turned into rice dishes, meat dishes transformed into vegetarian dishes, and so on. The whole point of this blog is NOT to get you to follow these recipes to the T, agonizing over every detail of each step (boooorrrriingg!), but to encourage you to have FUN with cooking & baking. Learn to embrace substitutions for ingredients you don’t care for with those you love. Tell those measuring cups & spoons that they’re not the boss of you, you’re the boss of them and you’ll use them as your taste buds please.
Take today’s Foodie Friday dish, for example. I made this for the first time when I was STARVING (and if you’ve ever met me, you know that once I hit the “I’m STARVING” phase, food had better come quickly, or else!). We didn’t have much in the fridge. But we had mushrooms. And in the pantry: pasta, garlic and marsala wine (seriously, you must have marsala wine in your pantry at all times). So easy. You can make this with or without the marsala; with rice instead of pasta; with less garlic; with a creamy bechamel sauce if you wish instead of light oil; with sauteed chicken or pork.
And here’s the fun part of today’s dish: I’m not gonna tell you how much of each ingredient to use. I offer some suggestions based on how I like the dish, but that’s it. It’s one of those dishes that lends itself well to experimentation based on YOUR specific taste buds. Think of my recipes as starting points–not finales. Experiment, and enjoy!
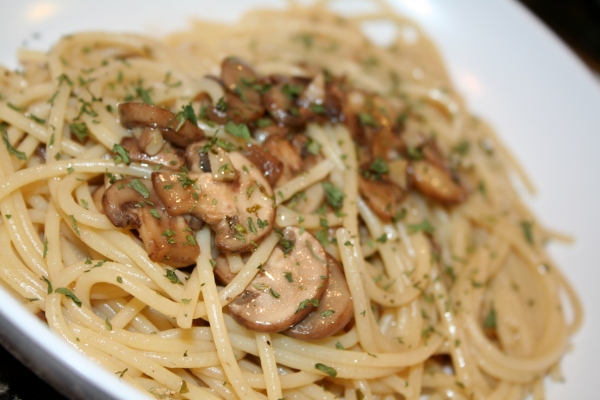

-Spaghetti or linguine. Penne will work as well. (about 1/2 pound feeds 2-3 people)
-Olive oil (about 2 tablespoons)
-Minced garlic (I use 3 cloves; you decide how garlicky you want it to be)
-Sliced mushrooms (I use a handful, literally; put in however much you like!)
-Marsala wine (don’t go crazy here; try around 1/2 cup)
-Lemon juice (unless you love lemons that much, I wouldn’t go too crazy here either; try 1 tablespoon or less)
-Chopped fresh or dried parsley
-Salt & pepper
-Parmesan cheese

1. Cook the pasta
2. While the pasta is cooking, heat olive oil in a pan over medium-high heat. Add garlic to the pan and sautee for about 1 minute until slightly soft.
3. Add mushrooms to the pan and sautee for about 1 minute.
4. Add marsala wine to the pan and gently stir ingredients in the pan while the wine warms up to a mild bubbly simmer.
5. Add lemon juice to the mushroom marsala mix.
6. Once pasta is cooked, drain and add it to the pan, gently fold together all of the ingredients so as to coat the pasta with the marsala mushroom mixture.
7. Top with fresh parsley, salt & pepper, and parmesan cheese as desired.
Mmmm….DONUTS!
Fact: donuts are not hard to make. If you take a little shortcut, they are even easier than baking cookies! You don’t even need a deep fryer – just a wooden cutting board, rolling pin, slotted spoon, plates and hungry tummies.

Here’s an insanely easy homemade donut recipe:

1 can pizza dough (yeah that’s right: pizza dough)
about 3.5 cups canola oil (but in a pinch veg oil will do)
1/2 cup granulated sugar
1 tablespoon cinnamon
4-6 hungry tummies

1. Roll out pizza dough on a floured cutting board until about 1/4 – 1/2 inches thick.
2.Heat oil in a medium-sized saucepan over medium heat.
3. In a shallow bowl, combine the sugar and cinnamon until well blended. If you need more, just remember to add twice as much sugar as you do cinnamon.
4. Use a large round cookie cutter to cut out the donuts. Then use a small, 3/4-inch round cookie cutter to cut out a hole in the center of each donut. Save the center dough circles for donut holes.
5. Make sure the oil is hot by dropping a teeny tiny piece of dough into the oil. If it’s ready, it should start sizzling up immediately (not a lot, but enough).
6. Using a slotted spoon, carefully transfer the cut out donut dough into the oil. I can fit about 4 or 5 in our saucepan at a time without overcrowding; use your best judgment based on the size of your saucepan.
7. Allow the dough to soak in the oil until the bottoms turn slightly golden, then turn them over. Once they are a nice golden color, use the slotted spoon to carefully lift them out of the pan and onto a plate.
8. Allow the donuts to cool just slightly, then gingerly dip each donut in the cinnamon sugar mixture, covering all sides with the sugary goodness. Do this with much love; it’s like giving your child that beautiful coat she’s always wanted and once she has it on she just shines. That’s what cinnamon sugar does to these donuts. Mmm-hmm.
9. Feed 4 – 6 hungry tummies with these tasty treats. Eat. Enjoy.
Then if you’re like me, consider going for a run later in the day, because low fat, these donuts are not 🙂
PS – I am working on a chocolate topping for these donuts. Haven’t quite gotten the best mix of melted chocolate to whipped cream ratio I like yet but you could try that too if you want some chocolate donuts. And who doesn’t want chocolate donuts? Also working on a maple topping. Because I LOVE me some maple bars. Mmm-mmm!
